Monday, March 24, 2014

Pride and Prejudice hat

Here is a turban I made at work at the BYU costume shop. This is designed my Melanie Lamb for Lady Catherine de Bourg in BYU's Pride and Predjudice 2014. She designed it and I made it from scratch.


Thursday, March 6, 2014

A Man for all Seasons

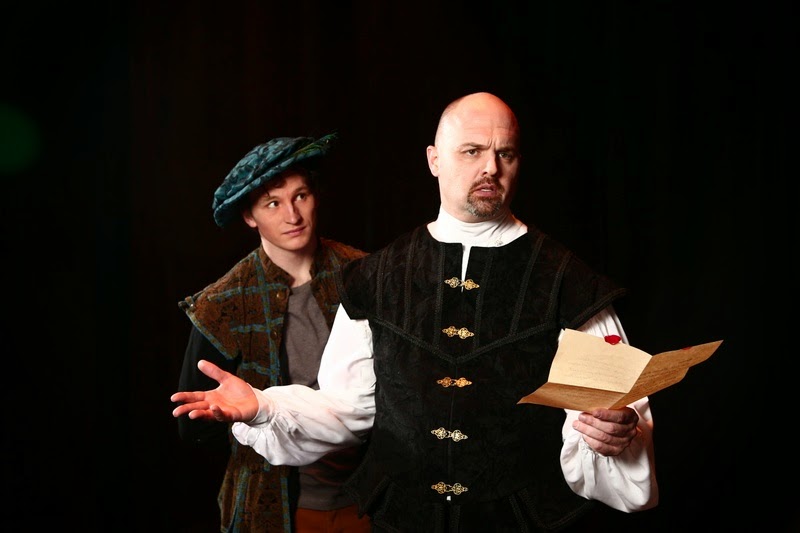
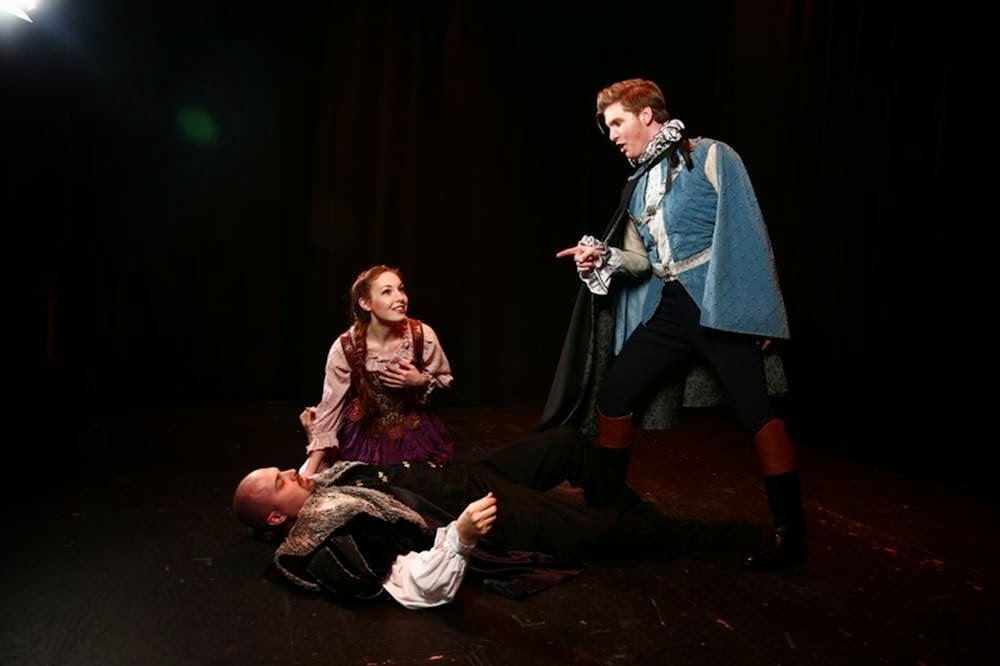
I am an assistant costume designer, backstage dresser, and costume crafts supervisor for BYU's A Man for all Seasons, directed by David Morgan. The costumes were co-designed by Amy Veronin and Angela Asay. Here is a link to the publicity film clip. And below are some publicity photos.


The Nightingale

Here are some publicity photos of BYU's The Nightingale. Costumes are designed by Donnette Perkins. For more information about the production, click here. This is a picture of the witch, whose headdress and bag I made while working at the BYU costume shop.

This is a picture of the Glorious general. I made his breastplate.


This is the nightingale, whose headdress I made.


Wednesday, March 5, 2014

Buckram Frame Hat

This is a buckram frame hat that I made and designed for my 468-R Millinery and footwear class in Fall of 2013 at BYU taught by Deanne DeWitt. The fame is buckram, and the fabric is cut on the bias, the small flowers on the back are made from ribbon, the feathers are dyed burgundy ostrich feathers, and the jewelry piece on the front is made from odds and ends I had. This hat is modeled by Ashley.


Sarah Stewart
Instructor Deanne Dewitt
TMA 468-R Millinery
17 December 2013
Construction
Supplies: Black fabric, blue flannel, double buckram, spray glue, ostrich feathers from Fancyfeather.com, jewelry pieces, purple fabric, black ribbon, leather needles, wire, leather thimble, and bias tape.
Directions:
1.      Obtain supplies.
2.      Trace pattern out on the buckram. Make sure that center back and center front are on the bias. Add seam allowance only on the inner circle of the brim. Use a half inch seam allowance.
3.      Cut out buckram.
4.      Sew wire on outer edge of buckram brim. This can be done with the zigzag stitch on a sewing machine.
5.      Sew wire on to the top and bottom of the buckram crown.
6.      Trace pattern out the lining fabric and cut. Add a half inch of seam allowance on all pieces. Only do one of each pattern piece.
7.      Sew lining of crown to buckram facing outward with bias tape on the top and bottom.
8.      Sew lining to top of brim, using bias tape on the outer edges.
9.      Sew brim into its round shape at center back.
10.  Sew tip to brim using whip stitch.
11.  Now cut out fashion black fabric on the bias. Cut two of every piece and be sure to add seam allowance of a half inch, with an inch as the brim’s inner circle seam allowance.
12.  First sew the tip fabric to the lined buckram tip using stab stitch. Make sure the bias is on the line from center front to center back.
13.  Now sew the fabric crown to the buckram so that no stitches are visible. Leave the bottom edge alone. Only sew the top part, covering the stitches from the tip.
14.  Now, sew the top brim to the brim on the outer edges of the buckram, after shaping the brim into the desired finished look. Make sure it is on the bias, and hide all stitches by sewing the top one on, then add the gathered or pleated band around the edges and sew it in place using the other brim piece, so that the two are being sewed on at the same time and the brim is totally covered on the top and bottom.
15.  Now, cut the inner circle seam allowance to make little flaps an inch thick all the way around. Bend these upwards.
16.  Sew brim to crown using stab stitch, and pushing the extra fabric of seam allowance inside. Make stitches as invisible as possible.
17.  Now, sew the inner fabric tip to the inner fabric crown. Mine were cut on the bias, but I would advise these not to be so that they fit better. Now, use spray glue on the inside of the buckram. Make sure it is not wet so that it does not bleed through the fabric.
18.  Glue inner pieces in place.
19.  Turn edge of fabric under, and sew to outer brim area. Hide stitches.
20.  Now, add any desired decorations, such as feathers, ribbons, and jewelry pieces. Refer to picture for inspiration.

Fosshape Hat

This is a perching hat I made and designed in my TMA 468-R Millinery and Footwear class Fall 2013 at BYU. It is made to look like a wedding cake and is work by my beautiful roommate Ashley.


Sarah Stewart
Instructor Deanne Dewitt
TMA 468-R Millinery
13 November 2013
Abstract
I made a hat that looks like a cake for my Fosshape hat project. I at first did my research, which was really just to look at cakes and see which ones I wanted to imitate, but I also looked up other cake hats to show what I was trying to make. I then drew up my design and the basic idea of what I wanted my hat to look like. Then I made my pattern, cut it out, and cut out the Fosshape. Then I sewed it together by machine. Then I steamed it on a head block and later a roll of paper towels to get the desired shape out of it. At this point, I was ready to add the fabric, and I was originally intending to make the hat out of felt and make cute little fruits out of the felt to go on top. However, I changed my mind because I decided I wanted the cake hat to be classy, not cute and childish, and I found an elegant cream rayon fabric, which I envisioned bunching really well into a frosting texture, and I found a pleated, shear, light fabric as well, which I thought would look great as a bottom frosting, so I decided to use those fabrics, which made my hat look totally different from my design, but still achieved the bunching frosting texture I had in my original design. After selecting these fabrics, I cut out the crown and top of my hat in the cream fabric and made the crown three times longer than the actual hat, and I basted it in four vertical lines and pulled the fabric back down to the four inches and put it onto the hat. Then I cut out and added the inner crown and top lining, and glued them in place using the spray glue. Then I sewed on the brim in the cream fabric, after which I sewed on the pleated shear fabric. Then I sewed on the bottom brim lining and at last my cake hat was finished and ready to eat . . .  wear.
http://fc09.deviantart.net/fs71/i/2012/325/7/7/lolita_cake_mini_top_hat_by_thepurplepumpkin-d5lpcfg.jpg
http://images.coplusk.net/project_images/46399/image/full_cake4.2_1267888896.jpghttp://th03.deviantart.net/fs39/200H/f/2008/314/c/1/Cake_Hat_mark_2_by_sakurafairy.jpghttp://images.coplusk.net/project_images/87317/image/full_Photo_on_2011-04-01_at_16.04__2_1301699910.jpg
Bibliography
Pictures taken from the following websites:
Supplies on hat: Fosshape, shear pleated fabric, cream rayon


Sarah Stewart
Instructor Deanne Dewitt
TMA 468-R Millinery
17 December 2013
Fosshape Hat Construction
Supplies: Fosshape, cream rayon, spray glue, and the usual sewing supplies
Directions:
1.      Obtain supplies.
2.      Cut out pattern leaving no seam allowance in fosshape.
3.      Sew crown into circle that fits the circle on the pieces.
4.      Sew crown to tip.
5.      Sew crown to brim.
6.      Now, steam the fosshape. Put something under it that will make it create the shape and size desired. It will shrink and harden into the shape it is steamed into. I used a roll of paper towels to create the shape of the tip and crown, and the table top to create the flat brim.
7.      Once the desired shape is achieved, cut out the pattern with an extra inch and a half on the inner circle of the brim. Cut out two pieces of each. Except for the crown. Cut one crown and then take a piece that is four times the height of the crown and the same in every other dimension.
8.      Take the piece that is four times the height of the crown, and baste it in four places that are equidistant. Sew the tip to this piece.
9.      Now, sew the brim top and bottom onto the fosshape, using stab stitch.
10.  Now gather the piece from step #8 on its basted stitches on all until it fits the crown and tip of the hat perfectly.
11.  Sew these pieces together using stab stitch and turning the raw edge under.
12.  Sew the second tip piece and the exactly cut crown piece together so that they will fit inside the hat as the inner lining.
13.  Now spray the glue on the inside of the hat.
14.  Put the lining in it, gluing it in.
15.  Turn the raw edge under and sew that bottom of the crown the bottom of the brim.
16.  Add any decorations, such as lace, sheer pleated fabrics, or jewelry piece to decorate the hat.